
Why the Dining Room Matters in Home Design
The dining room is more than just a place to eat. It’s where memories are made. Think family dinners, holiday feasts, and cozy coffee mornings. A well-designed dining room brings people together. It serves as a hub for connection and conversation.
This space also plays a key role in home functionality. It bridges formal and casual living areas. Many homes use it for work, hobbies, or even as a play area. A thoughtfully designed dining room can adapt to many needs. That’s why its design deserves attention.
Signs Your Dining Room Needs a Makeover
Is your dining room stuck in the past? Outdated decor can make the space feel dull. Worn furniture or faded colors often signal it’s time for change. A fresh look can breathe new life into the room.
Functionality matters too. Does the layout feel cramped? Are chairs uncomfortable? These issues can disrupt the flow of daily life. A makeover can solve these problems while adding style.
Updating your dining room also boosts your home’s value. Buyers love spaces that feel modern and inviting. Even small changes can make a big impact. Think fresh paint, updated lighting, or new seating.
Before-and-After: The Transformation Ahead
Our project started with a dated dining room. The walls were a tired beige. The lighting was harsh and uninviting. Furniture felt bulky and out of place. It lacked personality and comfort.
Challenges included limited space and poor lighting. The goal? Create a warm, functional area. We wanted a mix of modern style and cozy charm. Comfortable seating and better storage were priorities.
The makeover process wasn’t easy. Decisions about color, furniture, and layout took time. But the results were worth it. Imagine walking into a room that feels welcoming and stylish. That’s what we aimed for.
Key Goals for a Successful Dining Room Makeover
A successful dining room makeover starts with clear goals. Here’s what we focused on:
- Comfort: Choose seating that invites people to stay awhile.
- Lighting: Add fixtures that create a warm, inviting glow.
- Storage: Incorporate smart solutions for clutter-free dining.
- Style: Pick decor that reflects your personality and taste.
These goals ensure the space works for everyday life. They also make it a joy to spend time in.
Tips to Get Started on Your Own Makeover
Ready to tackle your dining room? Start by assessing the space. What works? What doesn’t? Write down your must-haves. This keeps the project focused.
Next, set a budget. Decide how much you’re willing to spend. Prioritize updates that add the most value. For example, a fresh coat of paint is affordable yet impactful.
Consider your lifestyle. Do you host large gatherings? Opt for extendable tables. Love quiet meals? Focus on creating a cozy atmosphere. Tailor the design to fit your needs.
Don’t forget to shop smart. Look for deals on furniture and decor. Thrift stores often have hidden gems. Mixing old and new pieces adds character.
Common Mistakes to Avoid
Some mistakes can derail your dining room makeover. One big error? Ignoring scale. A massive table in a small room feels overwhelming. Always measure before buying.
Another pitfall is skipping lighting. Poor lighting ruins the mood. Layer different sources—like overhead lights and lamps—for balance. Dimmers are a game-changer here.
Finally, don’t rush the process. Take time to explore options. Test paint swatches and sit in chairs before committing. Thoughtful choices lead to lasting results.
How a Makeover Can Transform Your Home
A dining room makeover does more than refresh decor. It enhances your daily life. A well-designed space encourages family time and relaxation. It becomes a room you actually use.
Guests notice too. An inviting dining room sets the tone for gatherings. It makes hosting easier and more enjoyable. Plus, it adds charm to your home’s overall vibe.
Whether you’re updating for yourself or resale, the effort pays off. A beautiful dining room is a gift to your home and those who share it. Let’s dive into the details next.
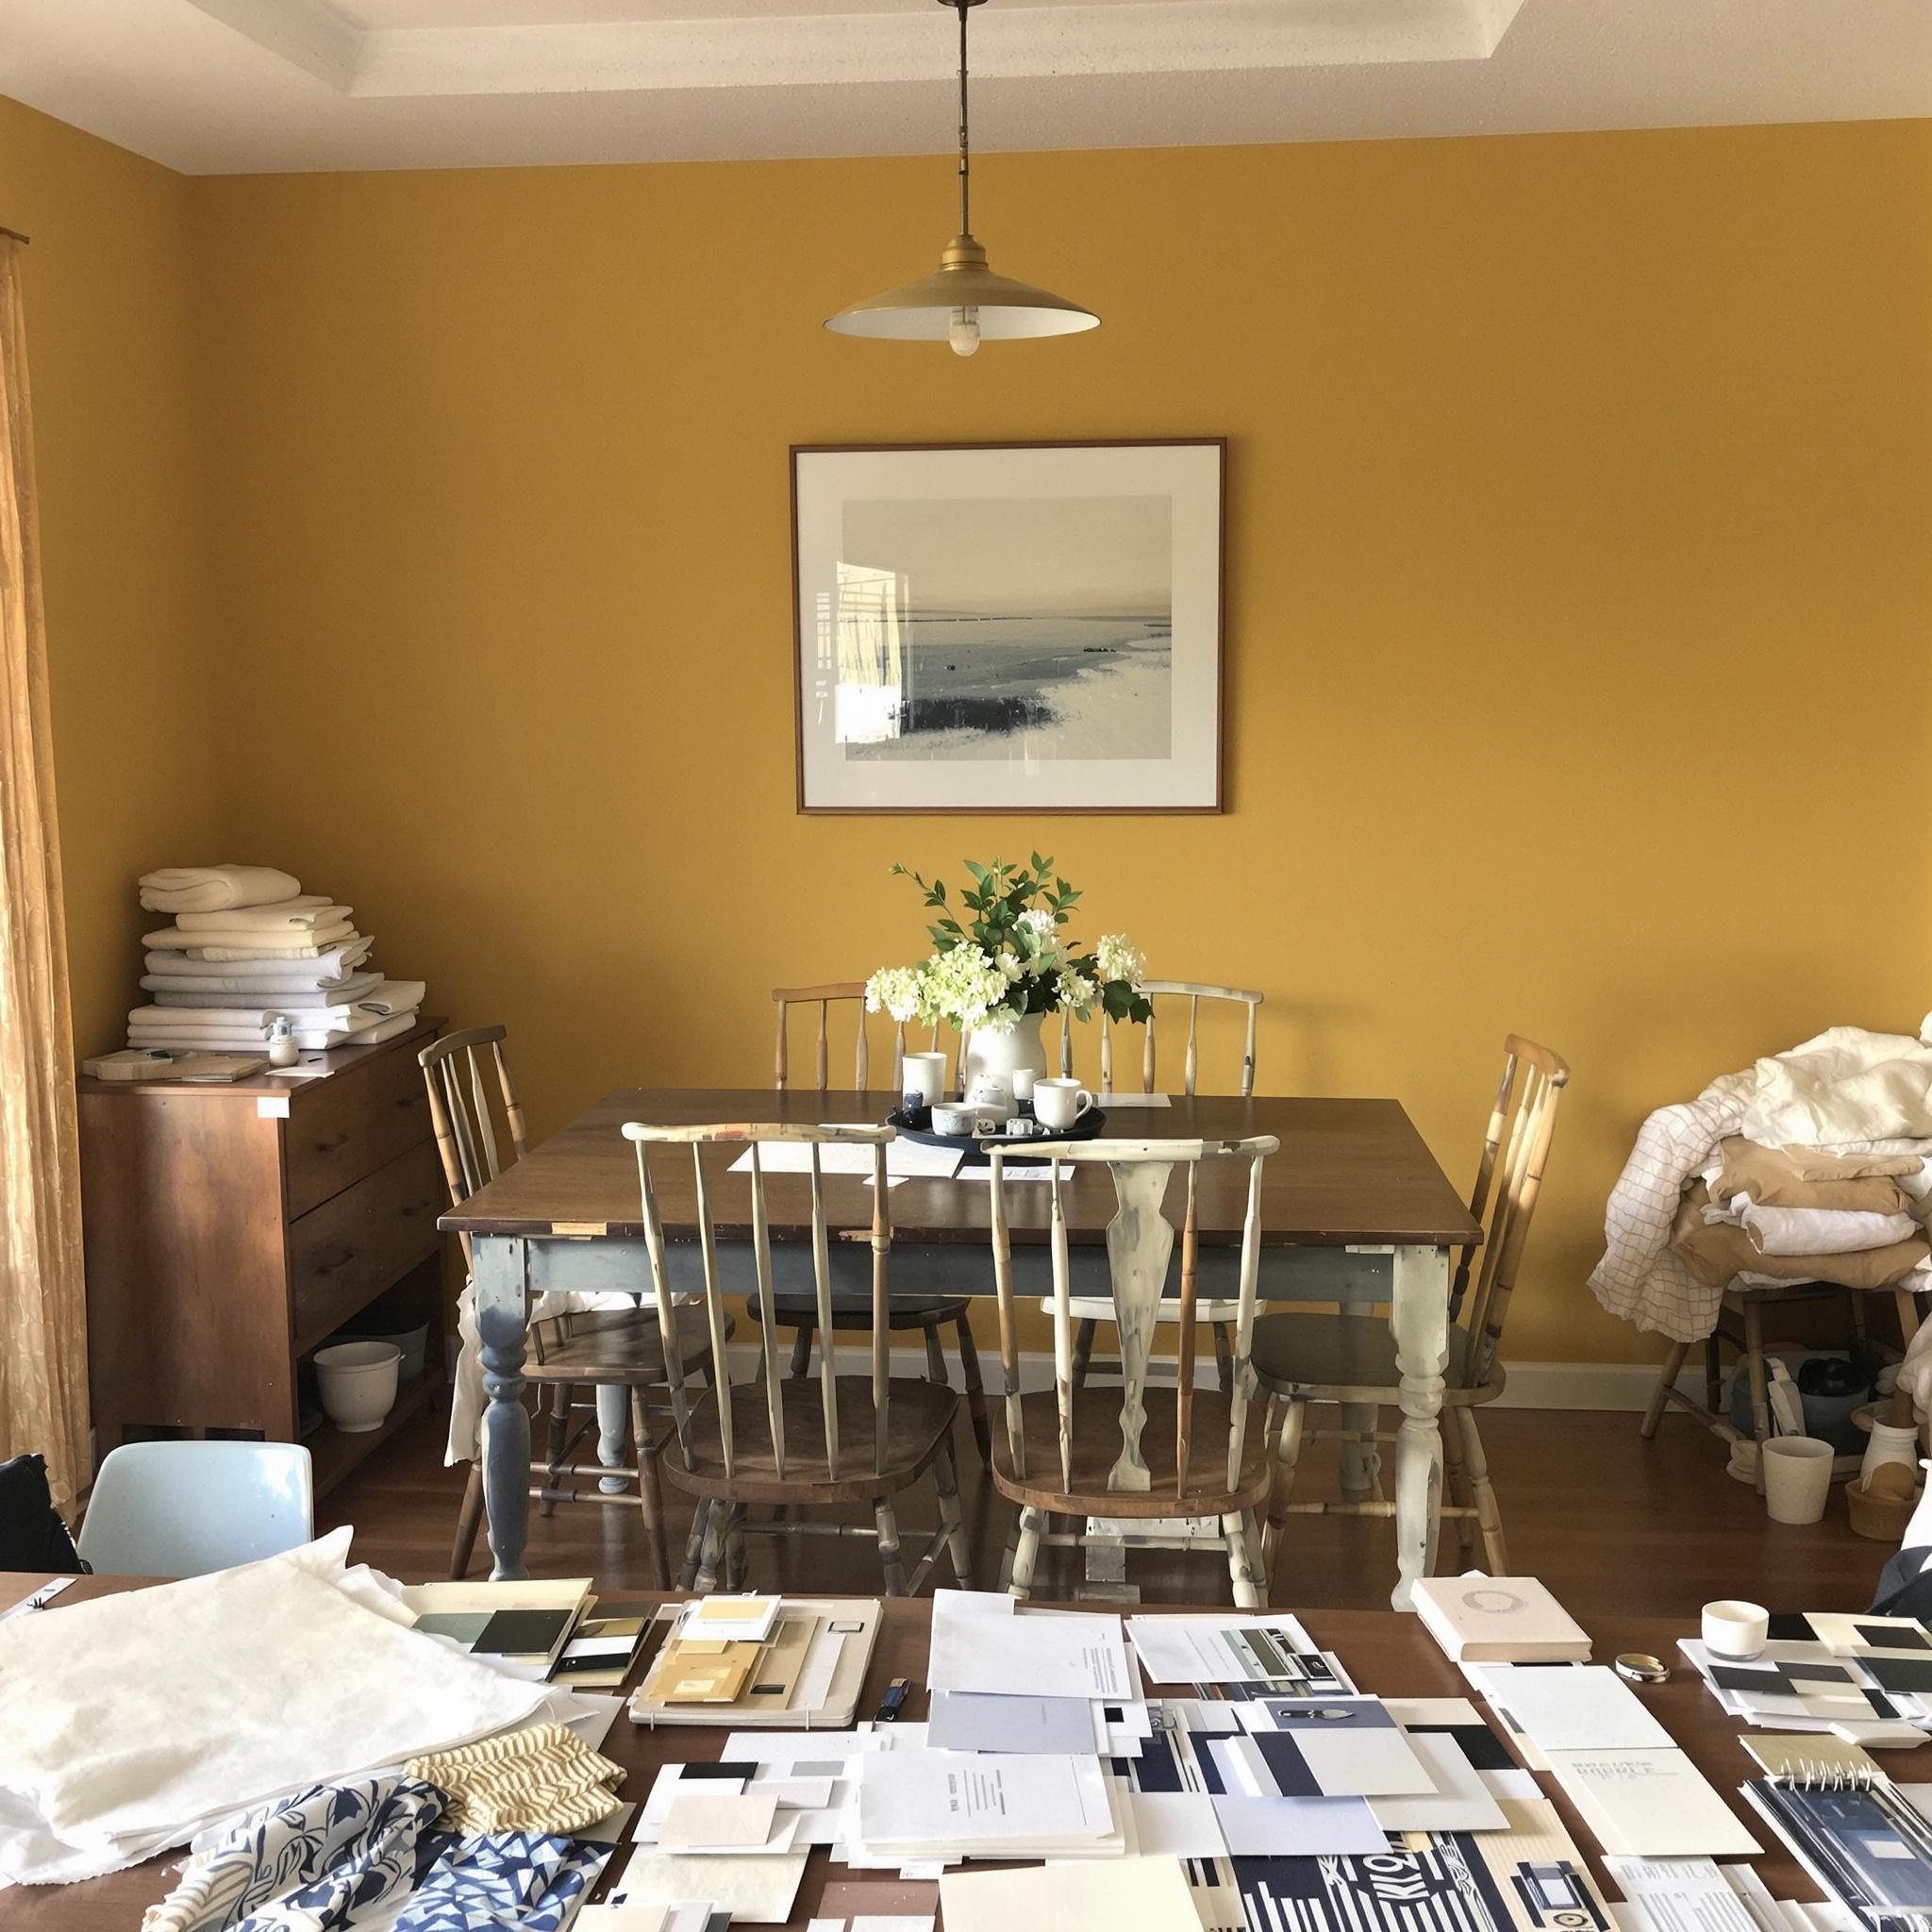
The Before: Challenges and Planning Phase
Let me tell you about this dining room before we fixed it up. It was cramped, outdated, and just plain sad. The table wobbled every time someone leaned on it—and that happened a lot. The chairs? Forget it. They were so uncomfortable, you’d think they were designed to punish you for sitting too long. I joked once that if we kept them any longer, they’d start charging rent.
The layout made things worse. The table was shoved against the wall, leaving no room to pull out the chairs without hitting the sideboard behind you. It wasn’t just awkward—it felt suffocating. You know how some rooms feel warm and welcoming? This wasn’t one of them. And the colors? Oof. Dark wood clashed with mustard-yellow walls straight out of the ’70s. No amount of candles could fix that dreary vibe.
So why did we finally decide to redo it? Well, aside from how bad it looked, it didn’t work. Storage was a nightmare. We had nowhere to put linens, plates, or anything else for hosting. Stuff ended up crammed into corners or piled on the sideboard. The lighting didn’t help either. One weak pendant light hung over the table, casting harsh shadows that made meals feel more like interrogations than cozy dinners.
Planning took forever but was worth it. Inspiration hit me randomly one night scrolling through Instagram. I saw this farmhouse-style dining room with rustic wood and soft neutrals. It gave me chills. That’s when I knew I wanted something warm and inviting. A quick Pinterest binge later, I had tons of ideas. Funny thing—I almost went industrial-chic until I realized it wouldn’t fit our cottage-style house. Lesson learned: stick to your home’s vibe.
Budget was a big deal. We weren’t rolling in cash, so smart choices mattered. Instead of buying all-new furniture, we kept the table and refinished it ourselves. Messy but fun. The chairs, though? No saving those. We replaced them with sleek upholstered ones that are comfy and stylish. Pro tip: Upgrade key pieces while keeping others. Sometimes less really is more.
Picking a theme and colors was tricky. After flipping through magazines, blogs, and even pausing movies for room inspiration, I settled on a modern coastal look. Think whites, beiges, and navy blue—not too beachy, but fresh and calming. Natural textures like rattan and jute added warmth without cluttering the space. Don’t sleep on textiles—a statement rug can change a room instantly.
Lighting became a big focus. Out went the sad pendant light. In came a gorgeous chandelier with frosted glass shades that softened everything. We also added sconces by the built-in shelves (yes, we added shelves!) for layered light. Lighting isn’t just practical—it sets the mood. Let me tell you, dinners now feel magical.
We kept the original table but swapped the bulky sideboard for something slimmer yet functional. Storage bins inside helped keep things tidy. Oh, and here’s a trick: we mounted a large mirror on the far wall. It reflects light and makes the room feel bigger. Smart, right?
- Pro Tip: Choose versatile furniture. That bench by the window? Extra seating and hidden storage.
- Quick Hack: Use peel-and-stick wallpaper for patterns without commitment.
- Budget Booster: Thrift stores and online marketplaces are great for cheap decor finds.
One last detail: plants. Adding greenery made a huge difference. A tall fiddle-leaf fig in the corner and small succulents on the shelves brought life to the room. I didn’t realize how much I needed them until now. They’re the finishing touch that ties it all together.
Honestly, the hardest part wasn’t the work—it was balancing style, function, and budget. There were hiccups, like spilling wood stain all over the floor. Or when the delivery guy scratched the new sideboard. Ugh. But hey, those glitches are part of the process.
In the end, I learned two big lessons. First, patience pays off. Rushing leads to regret; thoughtful planning gets results. Second, get creative. Repurpose old stuff or mix high-end with budget finds. There’s always a way to make it work—even if it takes a few tries.

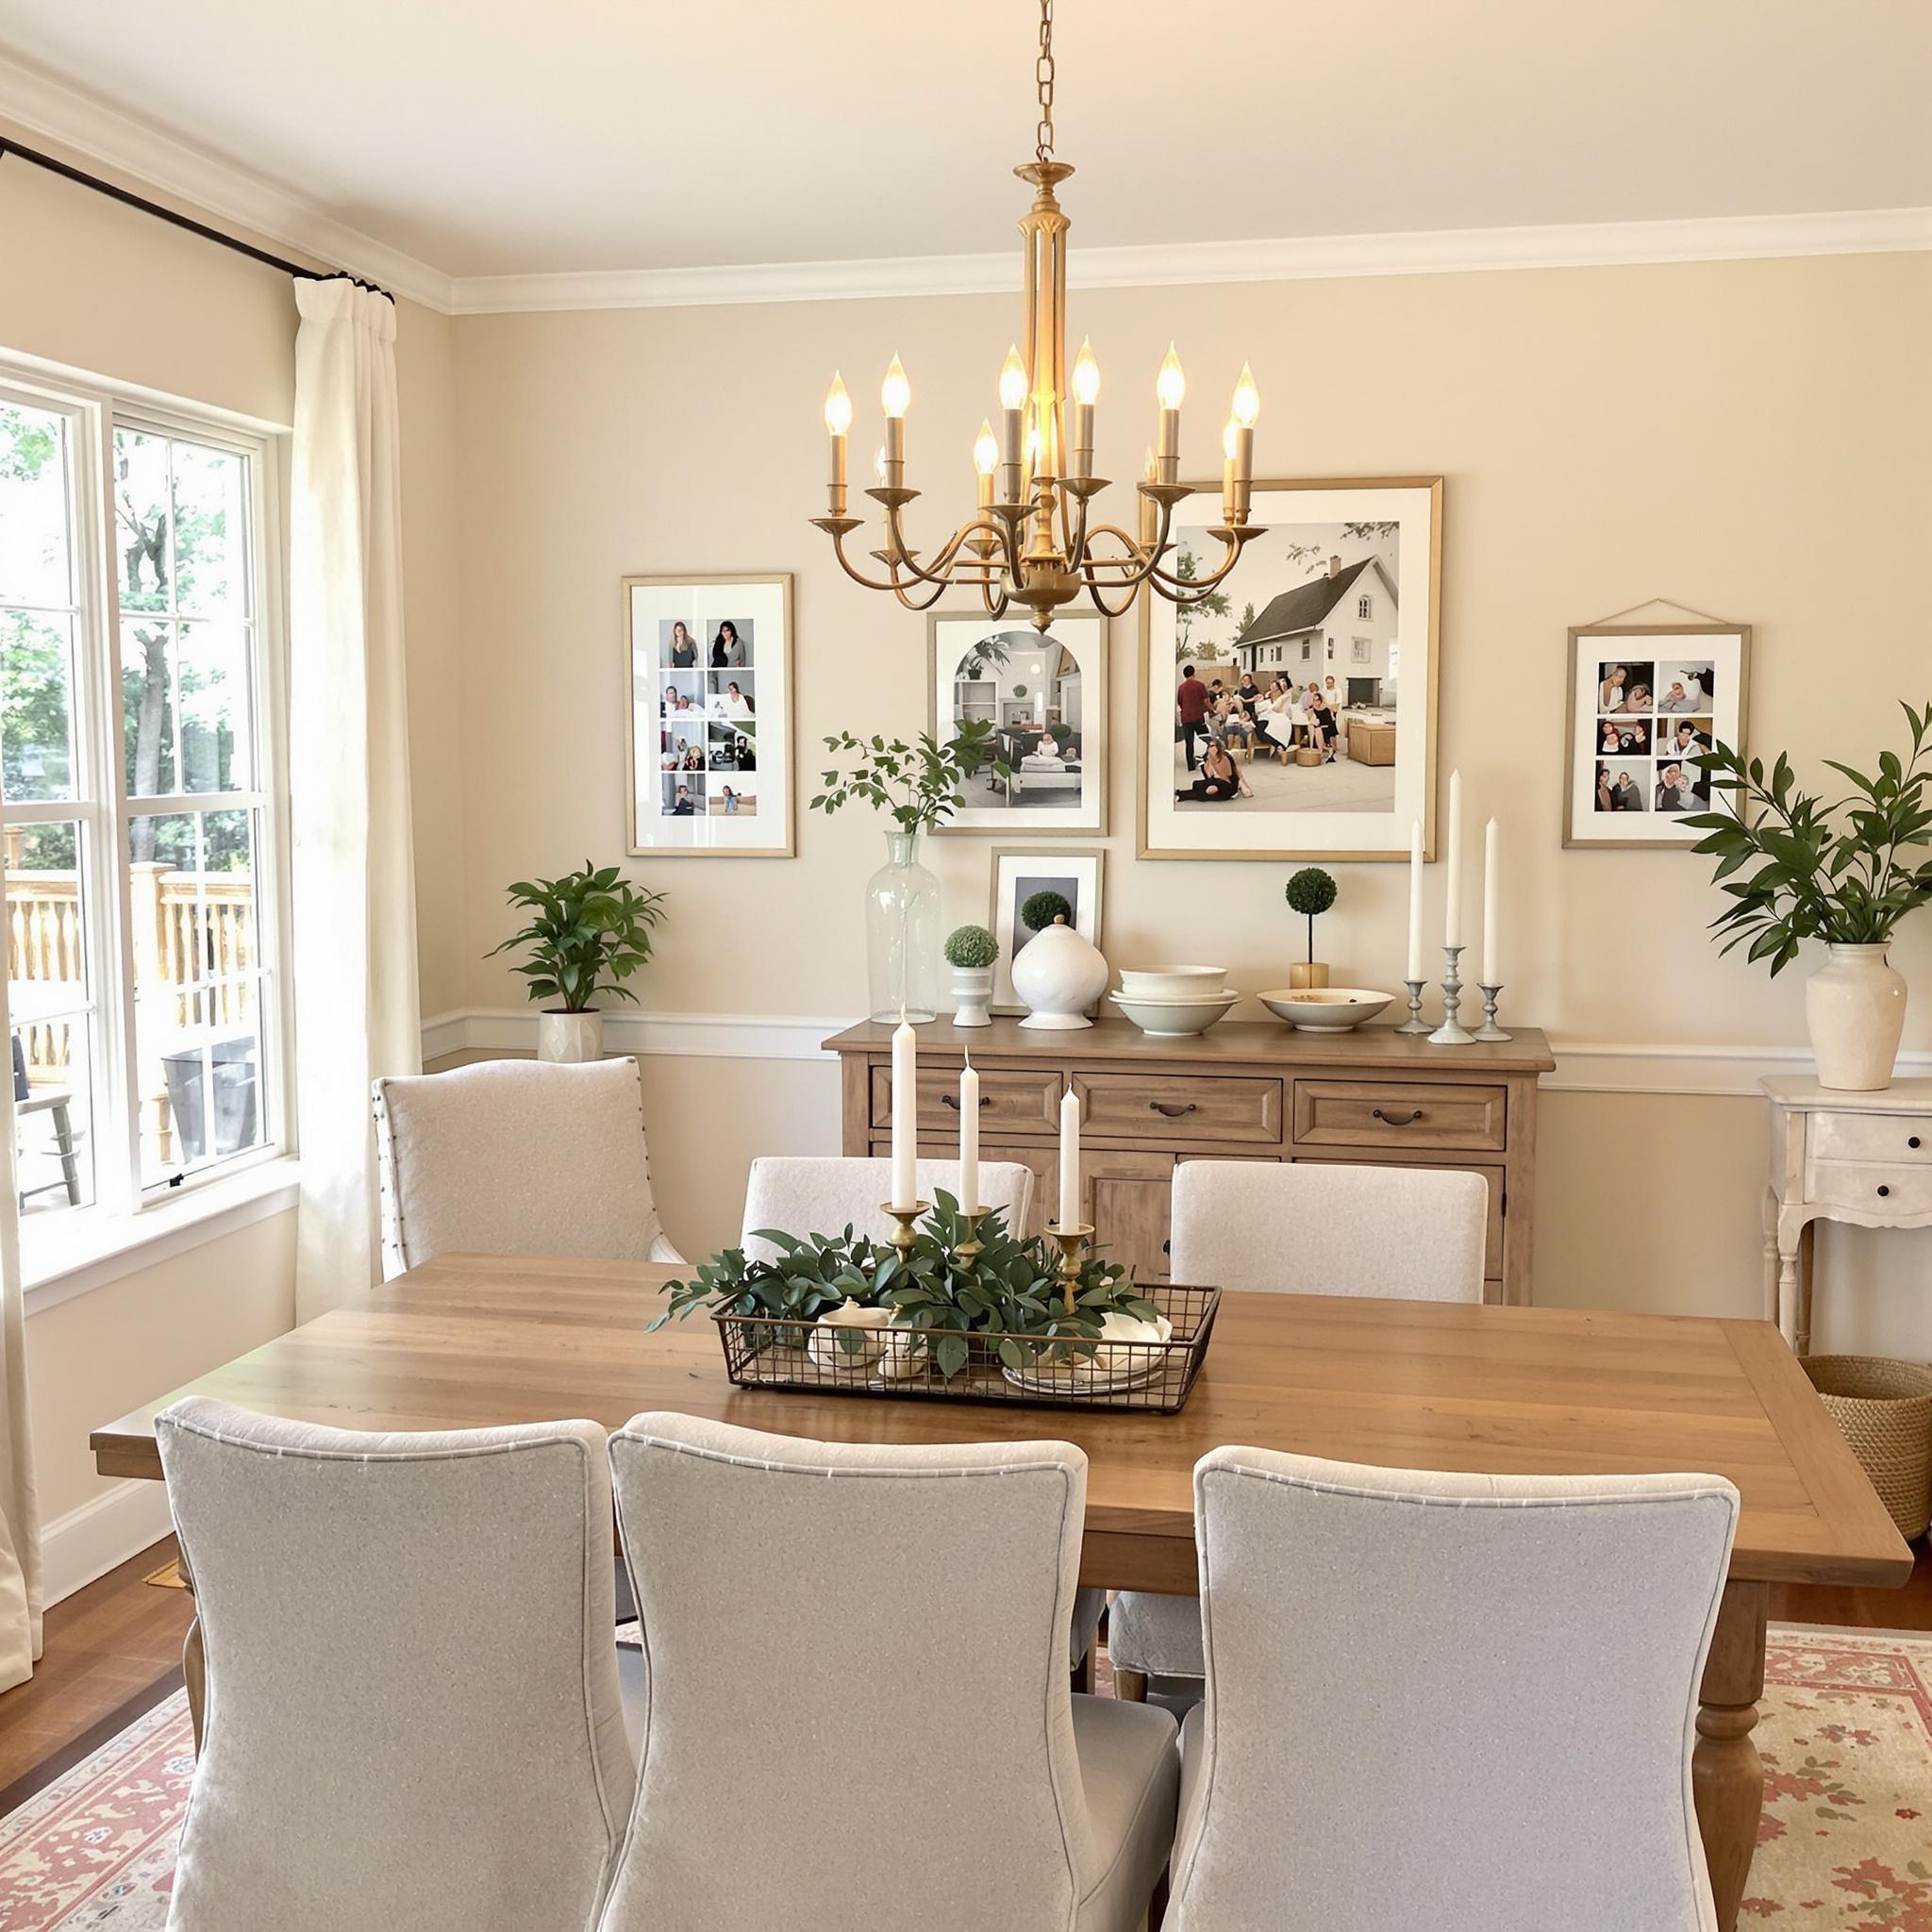
The Big Reveal: A Dining Room That Feels Like Home
Alright, let’s get to the fun part—the finished product. Imagine walking into the dining room and thinking, “Wow, this feels different.” It’s brighter, warmer, and way more inviting. Funny thing is, it’s not one big change—it’s all the small touches working together. Remember those early challenges? Yeah, they’re history now.
We started with the layout. Instead of shoving everything against the walls (a mistake I’ve made before), we floated the furniture. The table sits center stage, with plenty of room to move around. We swapped the old clunky table for a sleek, extendable one. Perfect for family dinners or game nights. And the chairs? Mix-and-match upholstered ones added personality and comfort without costing a fortune.
Lighting made a huge difference too. Forget that sad overhead bulb that made everyone look like extras in a zombie flick. Now, a statement chandelier hangs above the table. It’s modern but classic, casting a soft glow that makes meals feel special. Pro tip: thrift stores often have cool lighting options if you’re on a budget.
What Made the Biggest Impact?
Not every change had to be massive to matter. Some tweaks were small but effective. For example, adding a large mirror doubled the sense of space. It also bounces light around, making the room feel brighter. Another win? The gallery wall. I know gallery walls can seem tricky, but trust me—they’re worth it. Ours mixes family photos, art prints, and even a funky vintage clock. Lay everything out on the floor first to get it just right before hanging.
Here’s a funny story: when I suggested plants, my partner gave me a skeptical look. But now? Those green friends are the unsung heroes of the room. They add life and soften the edges. Snake plants and pothos are hard to kill, but if you’re worried, fake plants work too. No shame.
One of the biggest upgrades was tackling storage. Before, clutter ruled the room. Now, a sleek sideboard hides all the random stuff while doubling as a serving station for dinner parties. Baskets are great for stashing napkins, candles, or anything else you want out of sight but handy.
Tips and Lessons Learned: Your Blueprint for Success
So, what did I learn? A lot—and I’m sharing it with you. First, always start with a plan, but stay flexible. Things rarely go as expected, and that’s okay. When our rug clashed horribly with the curtains, we switched gears. Problem solved.
- Measure twice, buy once. Seriously, double-check your space before buying furniture. Nothing’s worse than realizing something won’t fit.
- Don’t skimp on comfort. Pretty chairs are nice, but if they’re uncomfortable, no one will stick around for dessert.
- Use your walls. Walls are valuable space! Add shelves or artwork to create depth and draw the eye up.
Here’s another biggie: avoid impulse buys. Sure, that neon sign might look cool in the store, but does it really fit your style? Take a picture, think about it, and revisit later. Chances are, you’ll realize it’s not a match. On the flip side, don’t hesitate to splurge on key pieces like the table or lighting. These are long-term investments.
Potential pitfalls? Oh, there are plenty. One major trap is trying to do too much at once. Rome wasn’t built in a day, and neither is a dream dining room. Spread projects out if needed. Also, watch out for trends that might feel dated in a few years. Shiplap walls? Already overdone. Stick to classic elements with trendy accents.
Final Thoughts: Transforming Spaces, Transforming Lives
At the end of the day, this makeover wasn’t just about looks—it was about creating a space for connection. Whether it’s Sunday brunch or late-night coffee chats, the dining room has become the heart of our home. Isn’t that what it’s all about?
If you take one thing away, let it be this: your home should reflect you. Don’t be afraid to experiment, mix styles, or break the rules a little. Design is personal—it’s an expression of who you are. So grab that paintbrush, move that furniture, and make it happen. You’ve got this.
Frequently Asked Questions About Dining Room Makeovers
- How do I pick the right dining table size?
Measure your space carefully, leaving 36 inches between the table and walls. Think about how many people you host and whether you need an expandable option. - What’s the best way to choose colors?
Start with neutrals, then add color through accessories. Use art or fabric you love as inspiration. - Can I mix wood tones?
Absolutely! Mixing woods adds warmth. Just tie it together with matching cushions or a unifying rug. - Should I DIY or hire a pro?
Simple updates like painting or styling can be DIY. Complex tasks like electrical work? Call a pro. - How important is lighting?
Very important! Good lighting sets the mood. Aim for layers—ambient, task, and accent lights. - What if my dining area is small?
Use slim furniture, mirrors, and vertical storage. Light colors and smart placement help too. - Where should I splurge versus save?
Splurge on durable items like tables and chairs. Save on decor like pillows or removable wallpaper. - How do I add texture?
Use woven baskets, plush rugs, or fabrics like linen. Wood grains and metal finishes count too. - Is custom furniture worth it?
If you need something unique or special, yes. But expect to pay more for it. - How often should I update my dining room?
There’s no set timeline. Update when it feels stale. Swap accessories seasonally for fresh vibes.